Continuing the JISC Enable Project technology retrospective,
this post describes the approach we have used to automate parts of the software
development process to improve the effectiveness of the development team.
Agile Project Management
The development team works in partnership with the customer to identify required features. We take a Scrum-style agile approach to software development which has the core roles of:
- Product owner - who identifies and priorities features to be developed
- Development team - who develop features according to self-organised plans
- Scrum master - who shields the development team from distractions and removes impediments.
In the case of our external examiner application, a colleague from our central quality service department acted as product owner and regular meetings were held with the intended user base to keep other stakeholders 'in the loop' with development progress and to show new features of the application as they were developed.
We use a free online agile project management tool called Pivotal Tracker to help manage the list of features to be developed and track progress in delivering those features.
Pivotal Tracker supports iterative development processes like Scrum, where development is 'time-boxed' into short regular iterations (or sprints in Scrum terminology). In each iteration, typically lasting a week or two, software features are developed by the team. At the end of the iteration, the software is demonstrated to the product owner. Because the product owner gets to see the software regularly as it is evolving, they get a better idea of what they really want from the software. During each iteration, the product owner can change the list of features to be developed by adding, removing and reprioritising features. In this way, the product owner can steer development direction to ensure a higher quality, more appropriate product is developed.
The Process Of Delivering A Software Feature
As each feature is developed, the developers follow a process to build and test the feature before it is deployed into production. An Archimate model of our current feature delivery process is shown below. The following sections describe the steps in the process and indicate where we have introduced automation to speed up development.
 |
| Archimate 'as is' view of feature delivery |
Develop Feature (Tests and Code)

Software features are developed on the Java Platform Enterprise Edition version 6 (Java EE 6) Platform as described previously on this blog.
Create Code and Tests Using Integrated Development Environments (IDEs)
 The developer creates code to implement a feature and also writes code that tests the feature. These tests can be run automatically later in the software build process.
The developers use Integrated Development Environments (IDEs) to maximise their productivity. IntelliJ IDEA is our primary IDE but we also use NetBeans if it is better suited to a particular task.
Our IDEs have a host of features to improve productivity. These include:
- Intelligent coding assistance
- Code generation
- Easy navigation and search of the codebase
- Automated refactoring
- Static analysis
- Support for languages other than Java
- Support for technologies and frameworks we use
Automated Builds With Maven
 We use Apache Maven to build and manage our software projects. We have used Apache Ant in the past to manage software builds but creation of the build files became too time-consuming. Maven takes a different approach by introducing a standard build lifecycle and a standard project folder structure which, as long as the developer abides by the convention, allows maven to build the software and run tests without the developer having to write any build files. For example, if a developer writes some unit tests and puts them in the /src/test/java folder of the project, Maven will detect and run the tests with each build automatically.
Maven is useful for getting developers to standardise on a project layout which helps new developers to get up to speed more quickly. It is also very easy to work with if you just want to perform the usual type of build activity in your project. If you need to do something that Maven can't accomplish by default or via plugins then it becomes harder to work with.
Maven also helps to manages dependencies of your software on other software libraries. This feature works very well in most instances but manual inclusion or exclusion is sometimes required when project libraries have transitive dependencies on different versions of the same library.
Automated Tests With JUnit
We use the JUnit unit testing framework to run unit tests. Unit testing is the practice of testing individual units of code in isolation from any other units. It is the lowest level of testing in the process. The aim is to ensure that the individual units are performing correctly before they are combined to produce software applications.
The unit testing approach involves setting the unit into a known state, calling an operation on the unit with some known input data and then checking the returned value to ensure it is as expected. Developers write code which performs this setup/test/teardown behaviour. JUnit provides a way to identify tests so that they can be run automatically (by Maven) during a build and provides support for setting up before each test and tidying up afterwards and support for checking the results through use of assertions.
Source code management
When multiple developers are working on the same project, it is important to use a source code management tool (a.k.a. version control tool). A source code management tool allows multiple developers to work on the same codebase without overwriting each others changes. It keeps track of the history of changes to the code, allowing changes to be rolled back if required. It can also automatically merge changes from different developers into the latest revision.

We use Apache Subversion for source code management. We have a subversion source code repository on one of our servers and all developers 'check out' code from the repository, make changes to it and then commit the changes back to the repository. Support for this process is built into the IDE.
 |
| IntelliJ IDEA version control menu |
Test (Local Commit)
 The unit tests are run as part of each project build to test the new features that have been developed. All the unit tests are run during every build so that any bug or regression that have might have been introduced in the latest round of development. Because all of the tests are automatically run as part of the build, the developer only has to trigger the build. The unit tests are run locally (on the developers PC) to check that they all pass before the code is committed to the code repository. If the tests do not pass and the developer has a 'broken build' and commits it to the source code repository regardless, other developers who update their code to the latest revision will have the same broken build. For this reason, it is important to get the test passing locally before committing the code.
Inspect/Manually Test
 Developers perform some manual running and testing of the software by installing it locally and using it as the end user would. IDEs have support for building, deploying and running software which speeds up the development, deployment and testing cycle. Manual testing is most useful to test usability and look and feel issues.
Commit
 When the developer is happy with the new feature and that the tests are passing, the code is committed to the code repository. This is done from inside the IDE. The subversion code repository configuration is stored in the IDE and the developer can simply select the files to be committed and select the commit option. The developer is then shown a list of the files to be committed and is prompted for a commit message. The developer supplies a commit message describing the changes that have been made to the codebase in this revision. The code is then committed to the repository and the commit message is stored in the change history. Commit messages are important because they allow other developers to identify what happened when which is invaluable when trying to determine which revision to roll back to or update to.
 |
| Revisions and commit messages - always include a message (unlike some of the examples above) |
Test (Commit Stage)
 Once the developer has checked the code for the new feature into the code repository the process moves on to an automated test stage where the same commit tests are run in a different environment (on the build server) to check that the new code is portable and can run in a different environment, i.e. it is not tied to the developer's local setup in any way.
 Continuous Integration with Jenkins
 We use Jenkins, an open source continuous integration server, to automate many of the operations in our build pipeline. Continuous Integration is the practice of integrating software, created by different developers, frequently, usually at least once a day. The aim is to avoid the situation, often encountered in traditional software development, where integration of software components happens late in a project and leads to significant problems getting the components to work together. With continuous integration, any problems are identified through the automated unit and integration testing which accompanies each build. The problems can be addressed immediately, thereby reducing the risk of the project because integration problems are tackled iteratively rather than in a more risky big bang manner late in the project.
 |
| Jenkins dashboard showing build jobs |
Jenkins provides a platform for running build jobs. It has support for Maven builds so we take advantage of this to reduce the amount of initial job configuration. To reduce the amount of work even further, we use NetBeans, which has excellent Jenkins support, to create the job in Jenkins from the local Maven project. Strictly speaking, NetBeans has support for Hudson rather than Jenkins. Jenkins was originally called Hudson and was developed by a Sun Microsystems employee Kohsuke Kawaguchi. After Oracle Corporation bought Sun Microsystems and took a rather overbearing approach to engagement with the Hudson developer community, the community voted with their feet and created Jenkins as a fork of the Hudson codebase. Oracle continues to develop Hudson in the absence of the community and Jenkins continues its healthy development with regular updates and a multitude of plugins. Setting up a Jenkins installation as a Hudson Builder allows the developer to create build jobs directly from within NetBeans.
 |
| Creating a build job from within NetBeans |
Jobs can be manually invoked through the Jenkins Web-based interface or automatically triggered via various mechanisms. We set up our Jenkins jobs to be triggered by changes to the code. Each Jenkins job polls the subversion code repository every 10 minutes to see whether the code has changed. When a developer commits new code, within 10 minutes Jenkins will detect that the codebase has changed and will trigger a new build of the associated Maven project. The Maven project will run as it did on developers machines, checking out the source code, running any automated tests and packaging the code into executable software - Java Web Archive (WAR) files in the case of our web applications.
Code Quality Analysis
 We configure each build job in Jenkins to run quality tests on the codebase using a tool called SONAR. SONAR reports on code quality and stores the results for each build results allowing downward trends to be identified, analysed and addressed.
  |
| SONAR dashboard gives an overview of quality metrics for a project |
 |
| SONAR Time Machine showing trends in quality metrics |
Deploy Artifact

 If the build job succeeds, the executable WAR file is stored in our artefact repository, Artifactory. Artifactory stores the WAR files from all successful builds along with details of the build. This enables us to reproduce any build when necessary. Deployment of the WAR file to Artifactory is done by the Jenkins Artifactory plugin. The Artifactory plugin adds options to the build job to deploy the artefact and build information.
 |
| Artifactory options in a Jenkins build job |
 |
| Artifactory stores the WAR from every build |
Deploy Application To Staging
 The next step of the build pipeline is to deploy the application to the staging server for further tests. The aim is to test the application in an environment which is as close to the production environment as possible. Currently this is a manual step, performed by a developer.
 GlassFish
 We develop Java enterprise applications and run them on the GlassFish application server. The developer downloads the WAR file from artifactory and uses the GlassFish Admin Console to deploy it and run it. This takes care of the code side of the application. The database also needs to be updated to work with the new code.
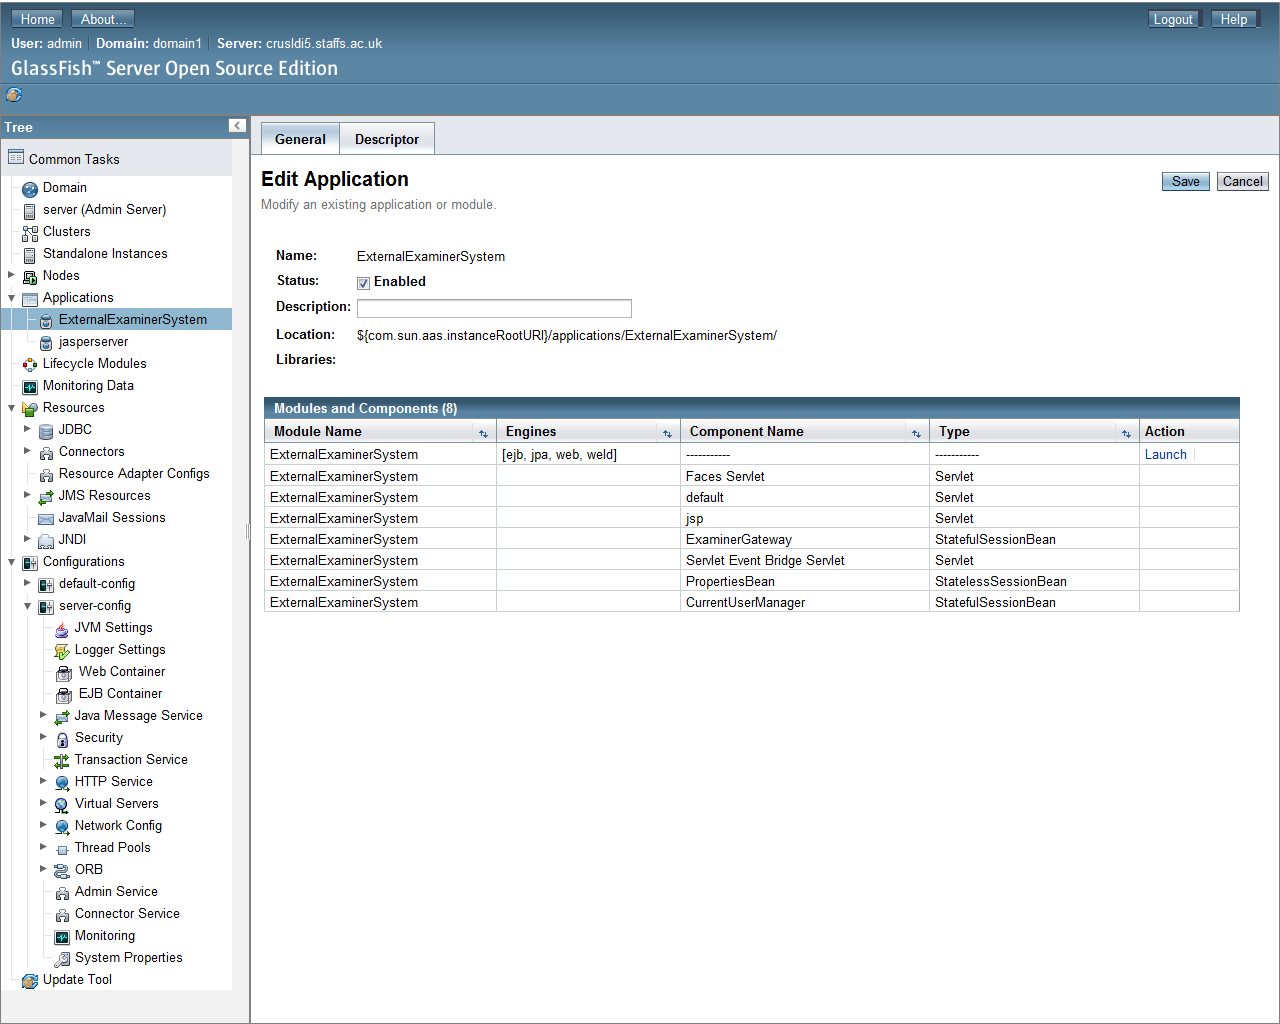 |
| GlassFish administration console |
MyBatis Migrations
 We use MyBatis Migrations to manage changes to the database schema. The MyBatis Schema Migration System (MyBatis Migrations) provides a simple mechanism for versioning and migrating the schema of a database. When a new version of the application is created, if the database schema has changed, we create an SQL script to update the schema to the new schema and another to roll back from the new schema to the old. These scripts are rolled into a versioned migration script which is used by Mybatis Migrations to apply changes to the database. The developer checks the current version of the database using the Migrations tool from the command line on the staging server and updates the schema to the latest version. Once the database has been updated, the application is ready for testing.
Test (Acceptance)
 The acceptance testing stage is manually invoked one but the acceptance tests are automated using Selenium Web Driver to perform browser actions of the tests. Selenium Web Driver is a tool that allows browser operation to be automated. Using it, we can create automated tests which interact with our applications in the same way that a user would.
The tests are created using the Selenium IDE which records browser actions as the user interacts with the application.
 |
| Selenium IDE showing recorded interactions |
Using the Selenium IDE, use cases or user stories can be enacted and recorded. These can be saved as code to be run as automated acceptance tests.
 |
| Saving interactions as a JUnit test |

With our current setup, the developer runs the automated acceptance tests from their PC. Because we are testing Web applications via the browser we can test from anywhere. If the acceptance tests pass, the application is ready for deployment to the production server.
Deploy Application To Production
 To update the application on the production server to the latest version, the developer downloads the WAR file from Artifactory and uses the GlassFish admin console to deploy it and uses MyBatis Migrations to migrate the database to the latest schema. With the application upgraded the cycle begins again.
Next Steps
We are working towards implementing continuous delivery and the steps outlined above have been put in place incrementally to move us towards this goal. Continuous delivery is a software development strategy that seeks to reduce the risk involved in releasing software by increasing the frequency of release and automating the release process. We have a number of improvements to make to our build process to automate the remaining manual steps, to add a Web-based interface to allow management of builds in the pipeline and to add smoke tests to check that all is well with the environment and that the deployed application has everything it needs to run in production.
 |
| We plan to remove manual steps through automation with Gradle builds |
We plan to use Gradle builds to automate the deployment and testing operations in the later stages of our build pipeline and to manage builds pipelines using the Jenkins build pipeline plugin. If you can afford it, there are many commercial tools which will provide this functionality out of the box.


4 comments:
I also use some project management tool for my business. Now Project Management Software is being designed with new and exciting innovative options to be used as additional helpers for managing your projects. The new options that are found in today's project scheduling software support the creation of a working plan ahead of beginning the task. Keep sharing similar post. Thanks.
Với các chàng trai, có thể nói chiếc áo ao so mi nam trang dep là một kiểu trang phục không thể thiếu trong tủ quần áo. Không chỉ mang đến vẻ ngoài trẻ trung và hiện đại, mà những mẫu ao so mi caro nam cao cap nam đẹp còn giúp các chàng trai trở nên sang trọng và quý phái hơn. Đặc biệt đối với các anh chàng công sở, những kiểu áo sơ mi nam công sở cùng quần kaki ao thun nam cao cap và balo laptop nam sẽ giúp cho bạn trở nên thật tự tin và nổi bật hơn. Ngoài ra, ao thun nam co co cao cap nam hàng hiệu còn là một trong những sự lựa chọn hàng đầu khi bạn đến các bữa tiệc quan trọng, chúng sẽ giúp làm bật lên vẻ ngoài quý ông, lịch lãm của bạn hơn. ao phong nam cao cap
Trong bộ sưu tập áo sơ mi nam thời trang, chắc chắn không thể kể thiếu áo sơ mi trắng nam,Quan lung nam cao cap kiểu áo sơ mi nam trơn cơ bản mà bất cứ ai cũng có. Bên cạnh đó, bạn cũng có thể chọn cho mình những kiểu thiết kế khác như áo sơ mi nam họa tiết quan short kaki nam dep cho chàng trai thích nổi bật, áo sơ mi jean nam dành cho những ai thích sự bụi bặm và chút lãng tử. Hay áo sơ mi Hàn Quốc trẻ trung để phối cùng quần quan short jean nam hang hieu jeans nam, và cardigan nam thanh lịch khi đi làm, đi dự tiệc cùng áo sơ mi cổ trụ. quan dai nam dep Đừng quên những kiểu phụ kiện khác như vòng đeo tay, nón phớt,… chúng sẽ giúp cho bộ trang phục và phong cách của bạn trở nên nổi bật hơn.quan kaki nam cao cap
tiểu sử sơn tùng m tp
mẫu quần kaki nam
shop quần jean nam
shop quần Áo nam hàng hiệu
shop Áo sơ mi nam đẹp
shop Áo thun nam
shop Áo khoác nam
mẫu áo khoác da nam đẹp
phân biệt quần jean levi's thật giả
thời trang h&m
tặng quà sinh nhật cho chồng
nên tặng quà sinh nhật gì cho bạn trai
mua áo sơ mi nam ở đâu đẹp
mua quan ao tren mang
Enjoyed reading the article above, really explains everything in detail, the article is very interesting and effective. Thank you and good luck for the upcoming articles .
Digital Marketing Training in Chennai
Digital Marketing Course in Chennai
IDM crack is an acronym that stands for Internet Download Manager and this tool comes handy to handle all your download issues. IDM Full Version With Crack
Post a Comment